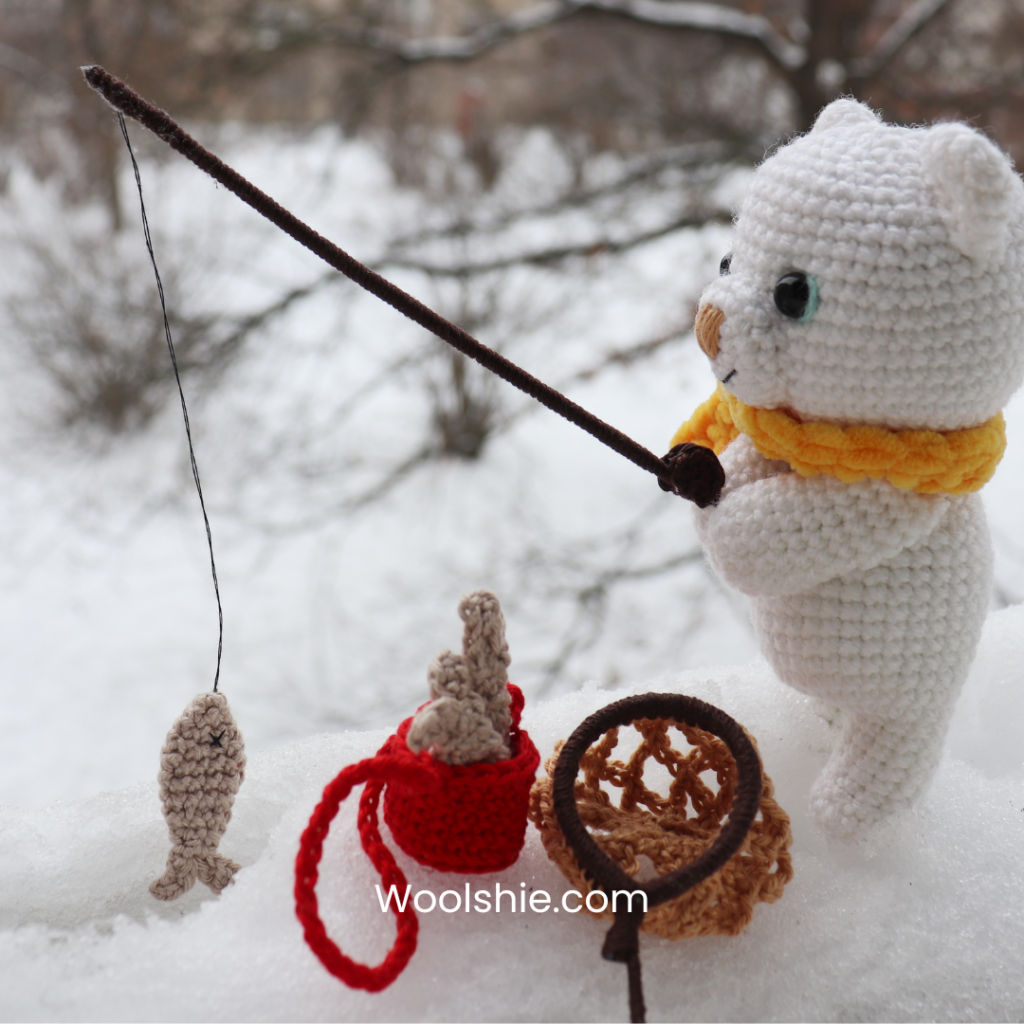
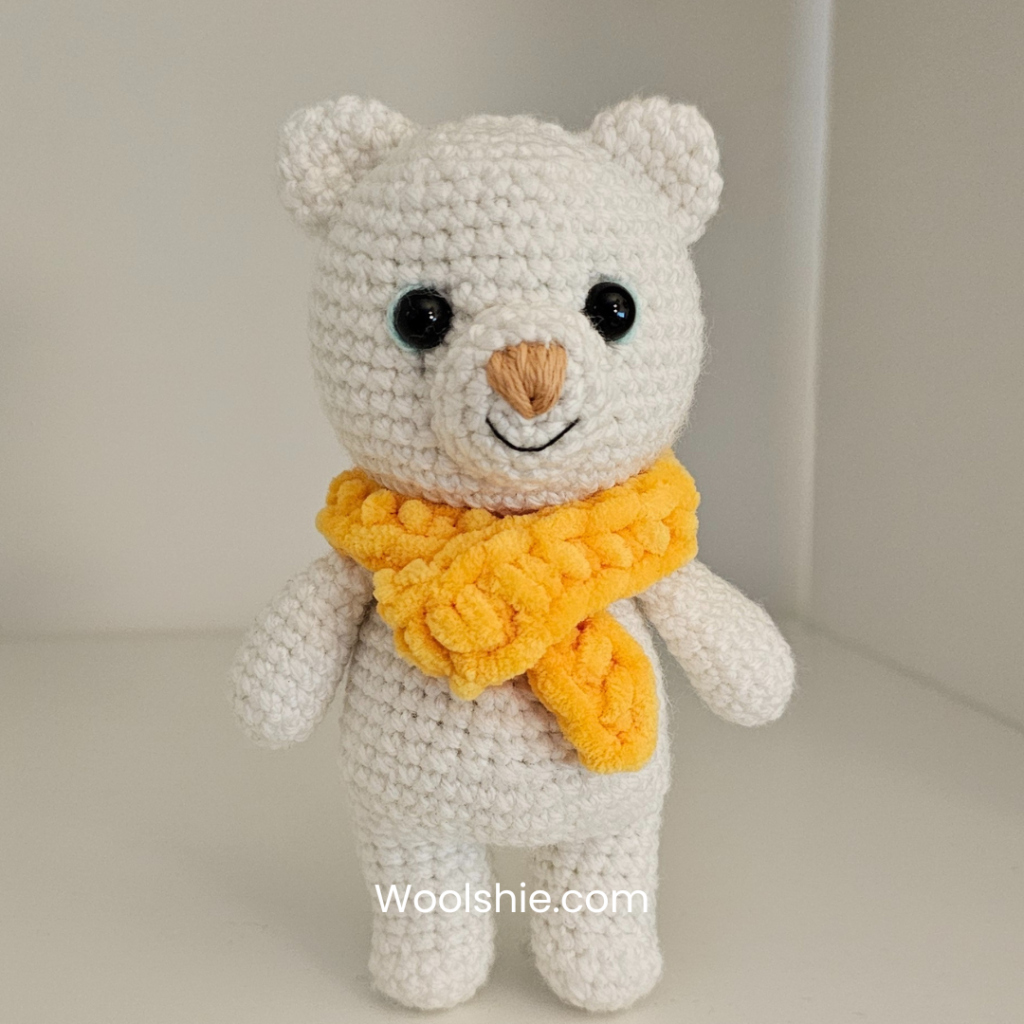
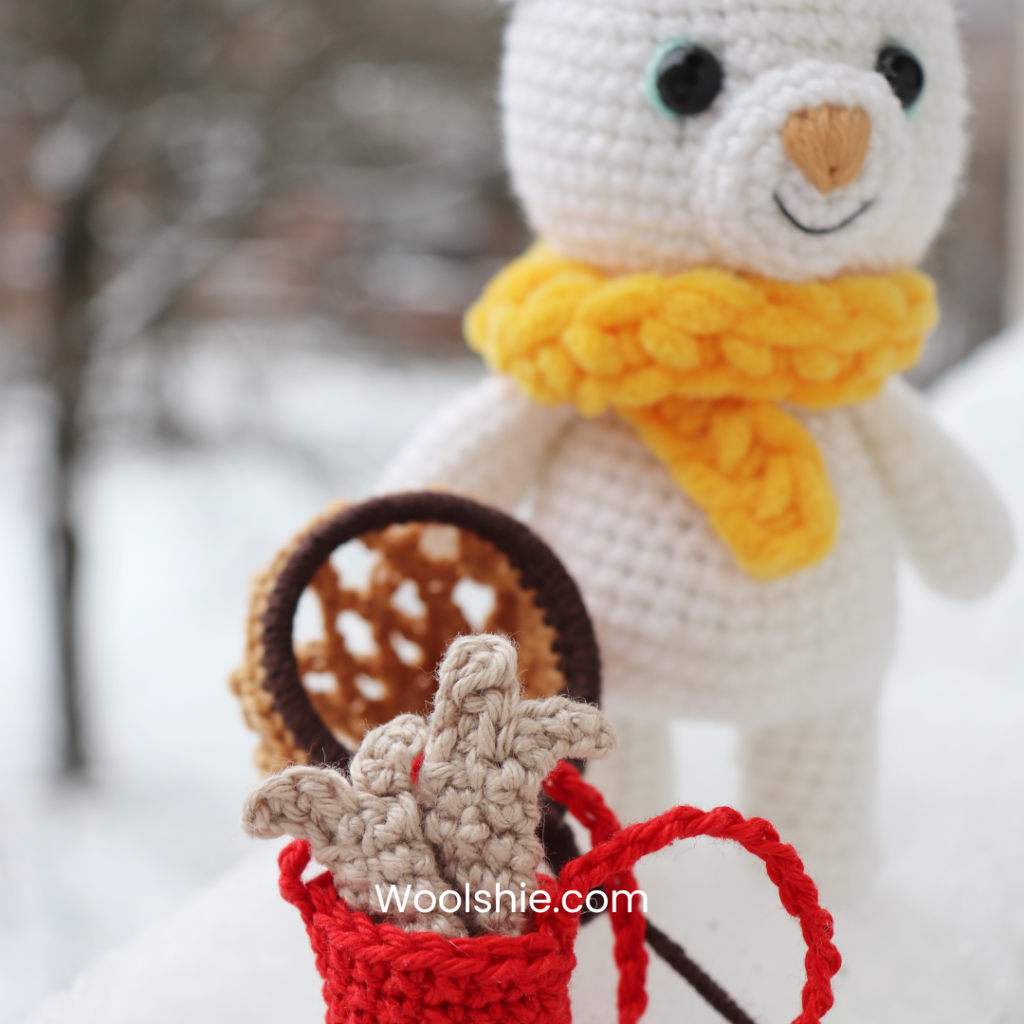
Meet Pito the Polar Bear! Pito is part of our January 2026 collection, Arctic and Snowy Pals. He is a cheerful fisher bear who loves exploring the snowy season and catching fresh fish along the way. This free polar bear crochet pattern is perfect for beginners who enjoy amigurumi projects and cozy winter-themed makes.
Pattern Details
- Skill level: Beginner-Intermediate
- Finished size: ~14 cm (5.5 in) height and ~8cm (3 in) width
- Yarn: Light Worsted/DK (for body), Bulky/Chenille (for scarf)
- Crochet hook: 2.5 mm
- Terminology: US Terms
- Worked in: continuous rounds
Copyright
This pattern is © Woolshie. Do not copy, reproduce, or share, in partial or full, without permission. You may sell finished items in small quantities. Please credit @woolshie when posting online.
Materials and Tools
- For the bear’s body part, I used light worsted weight yarn (Nako Bonbon DK100 Acrylic) in White
- For the scarf, I used Yellow (Alize Bulky Yarn)
- For Eye lining, it was just a scrap yarn of Aqua blue (Himalaya Everyday Bebe)
- 2.5 mm crochet hook
- Fiberfill
- 5 mm amigurumi safety eyes
- Stitch marker
- Pins (Round pins or T-pins)
- Scissors
- Yarn needle
- Black sewing thread
- Sewing needle
US Terms Abbreviations
- MR – Magic Ring
- CH – Chain
- sc – Single crochet
- dec – Decrease
- inc – Increase
- sl st – Slip stitch
- BLO – Back loop only
Pattern Notes
- This pattern works in continuous rounds.
- Use stitch marker to mark each end of the round. The number of stitches is shown inside the parentheses (…) each round.
- Fill in fiberfill gradually and firmly to achieve preferred shape.
- Maintain consistent tension. Adjust the hook size if needed.
- Read the pattern before starting.
Gauge
This amigurumi pattern is designed to be worked with even, tight stitches to achieve a neat and well-shaped finish. Gauge is not critical for this project, but consistent tension is important for best results.
Let’s start crocheting
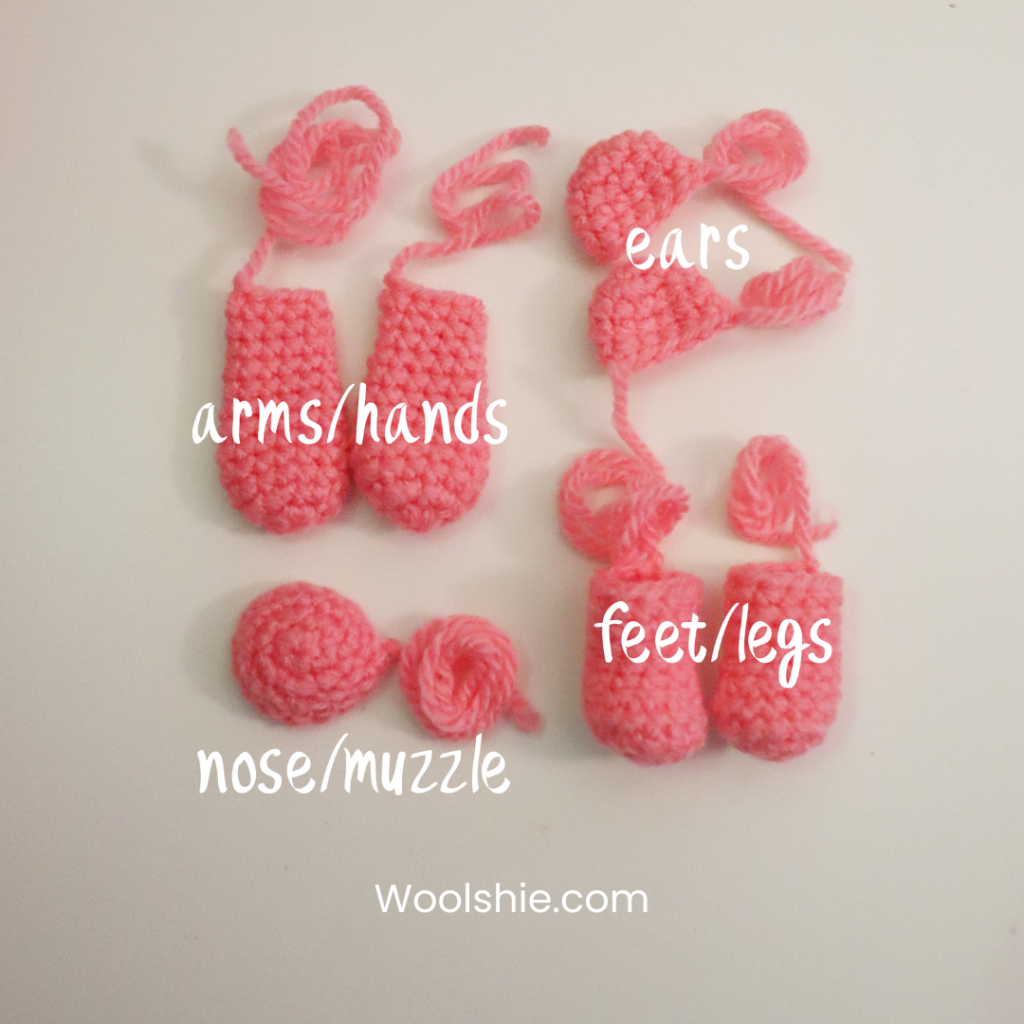
First things to crochet are the small body parts (hands, nose/muzzle, ears, then work up way from feet/legs — body — head)
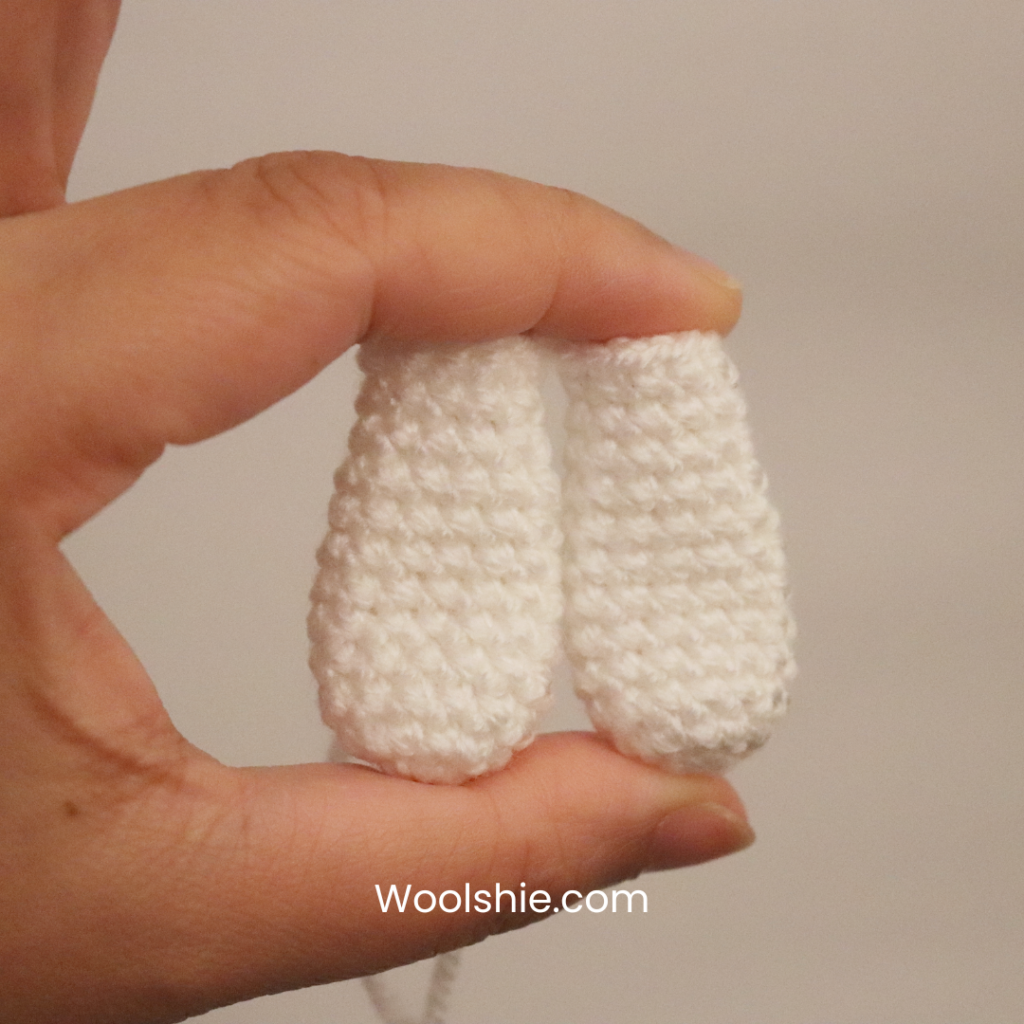
Arms/Hands
Make 2. Use base color (white) yarn
Round 1. MR 6 sc (6)
Round 2. Inc all around (12)
Round 3. 1 inc, 11 sc (13)
Rounds 4-6. Sc all around (13)
Round 7. 1 dec, 11 sc (12)
Round 8. Sc around (12)
Round 9. 1 dec, 10 sc (11)
Round 10. Sc all around (11)
Round 11. 1 dec, 9 sc (10)
Round 12. Sc all around (10)
Fasten off. Cut the end. Fill with a little fiberfill.
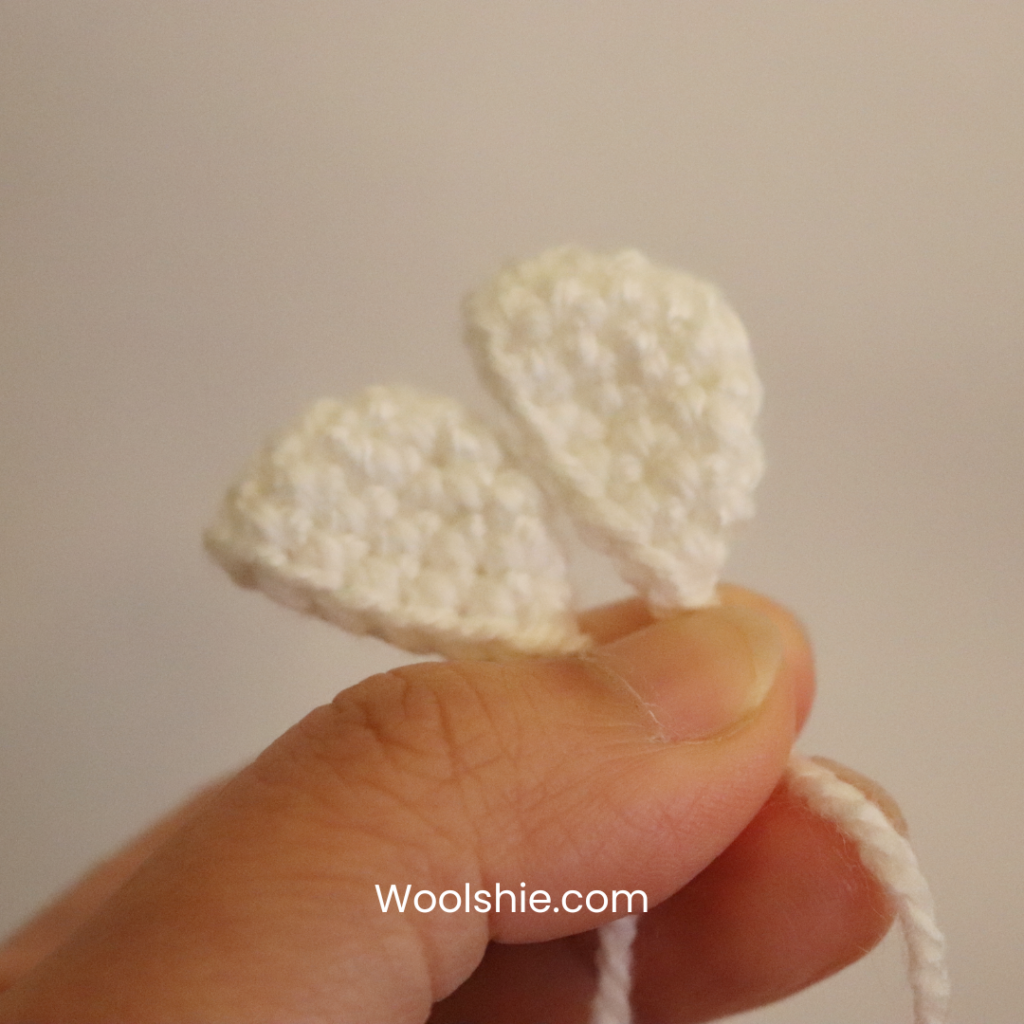
Ears
Make 2. Use base color (white) yarn
Round 1. MR 6 sc (6)
Round 2. Inc all around (12)
Rounds 3-5. Sc all around (12)
Fasten off, cut a long yarn end.
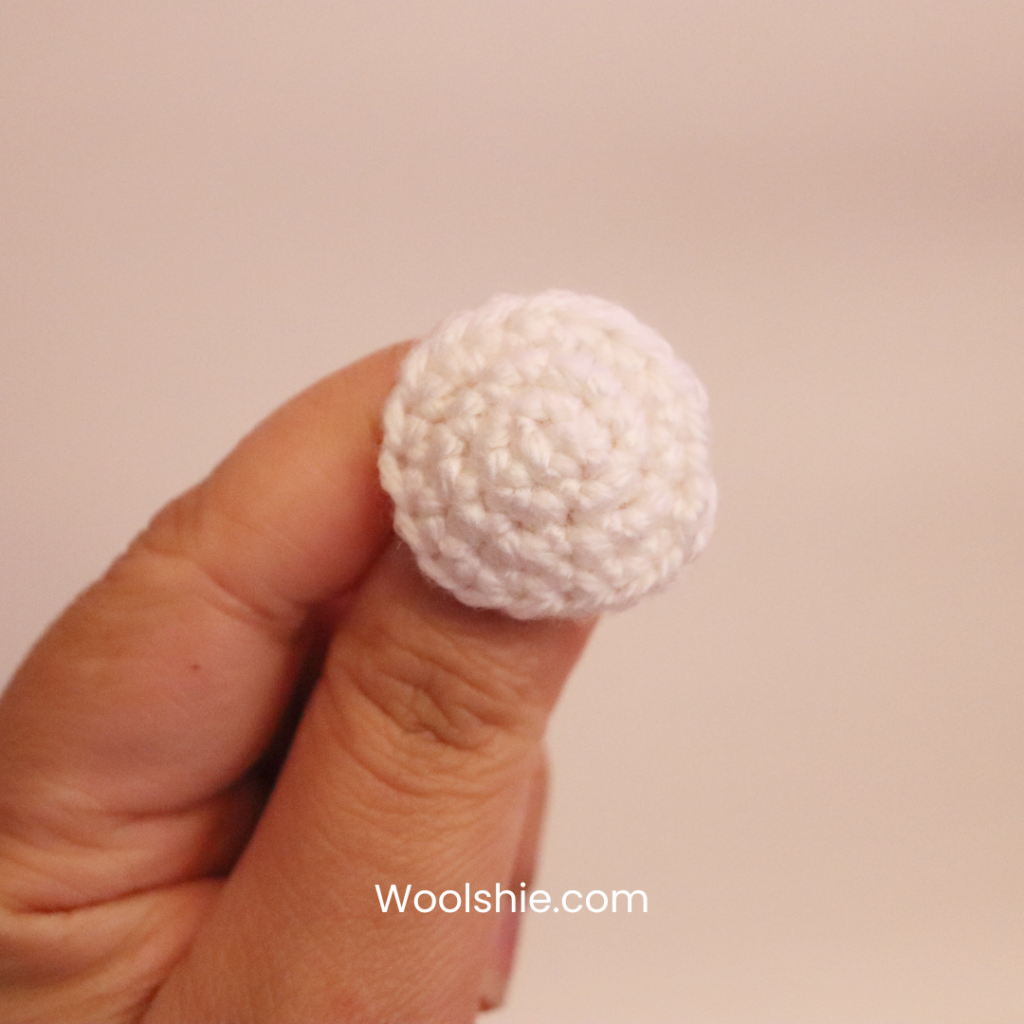
Nose (Muzzle)
Use base color (white) yarn
Round 1. MR 6sc (6)
Round 2. Inc all around (12)
Round 3. Sc all around (12)
Fasten off, cut a long yarn end.
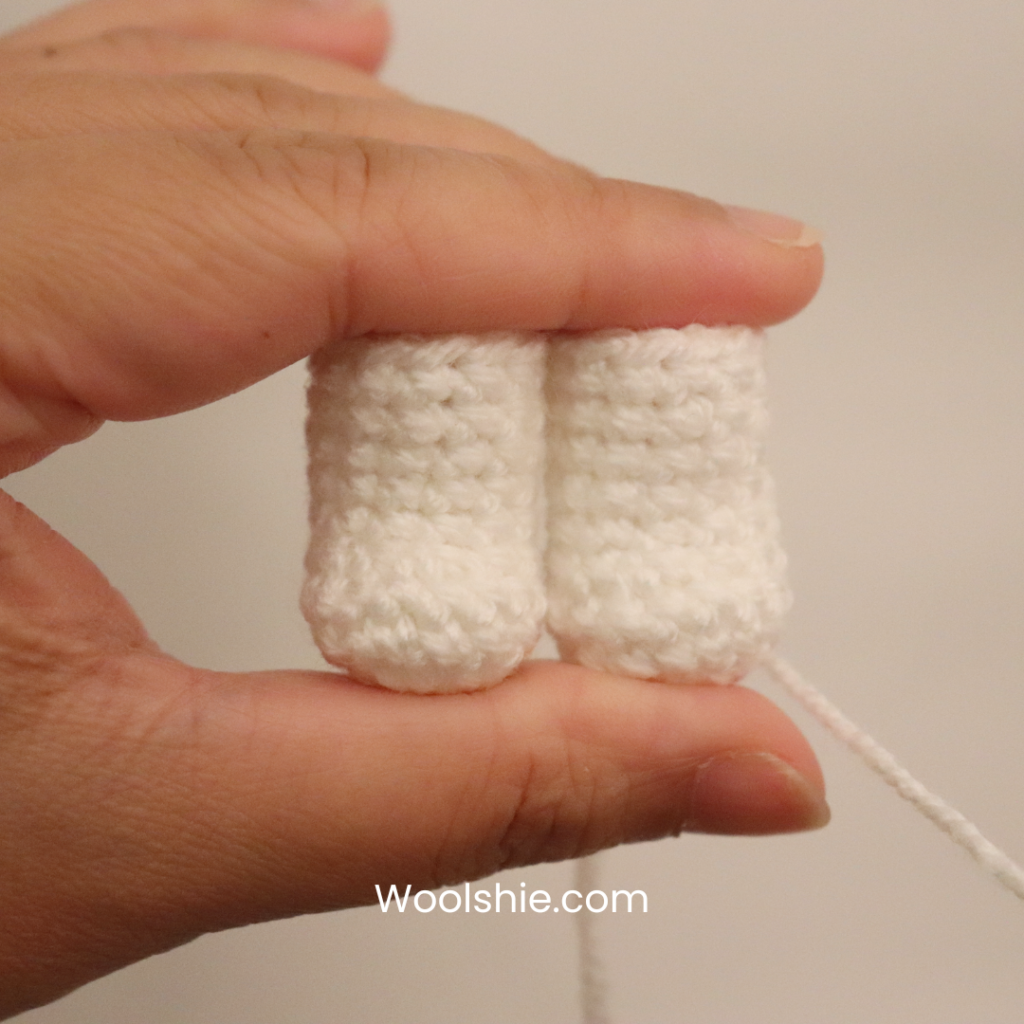
Feet/Legs
Make 2. Use base color (white) yarn
Round 1. MR 6 sc (6)
Round 2. Inc all around (12)
Round 3. [1 sc, 1 inc, 2 sc] x3 (15)
Round 4. Sc all around (15)
Round 5. 4 sc, 3 dec, 5 sc (12)
Rounds 6-10. Sc all around (12)
Fasten off. Cut the end.
Body
Use base color (white) yarn.
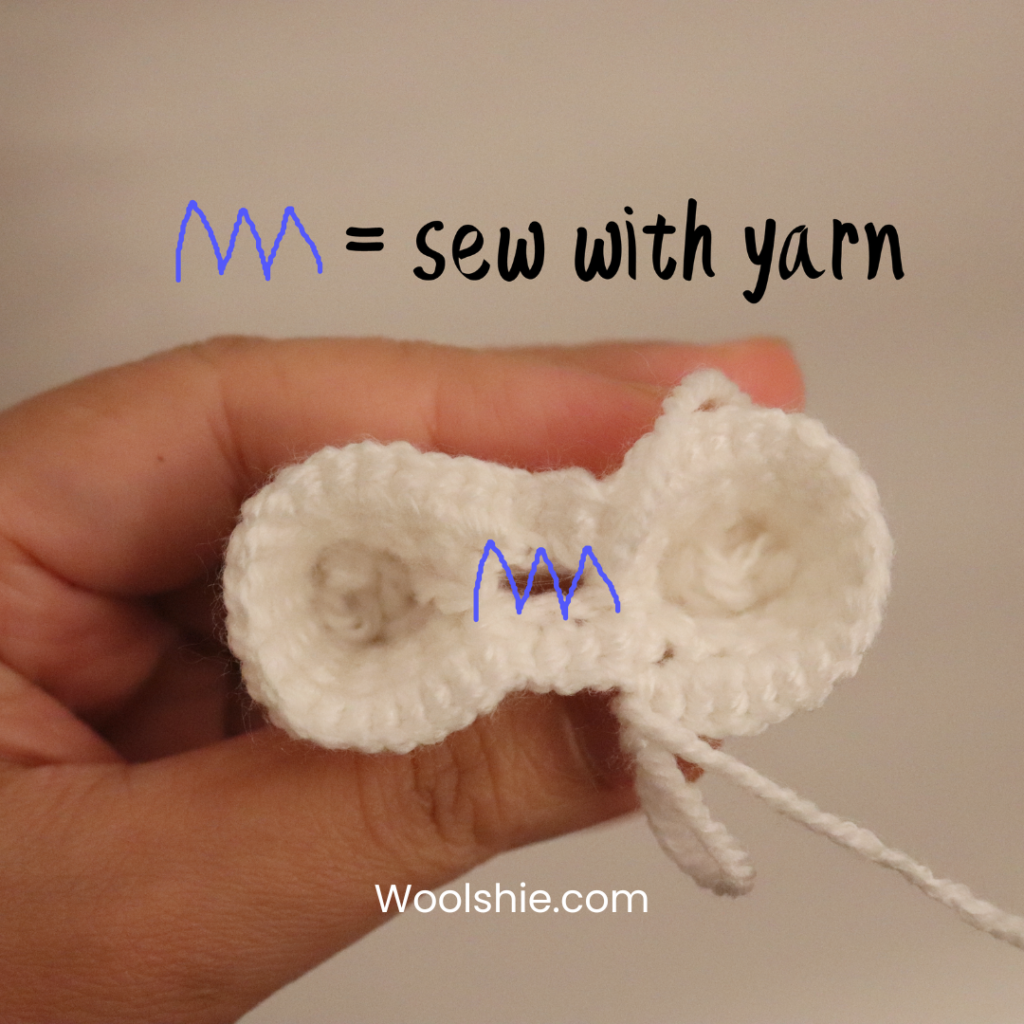
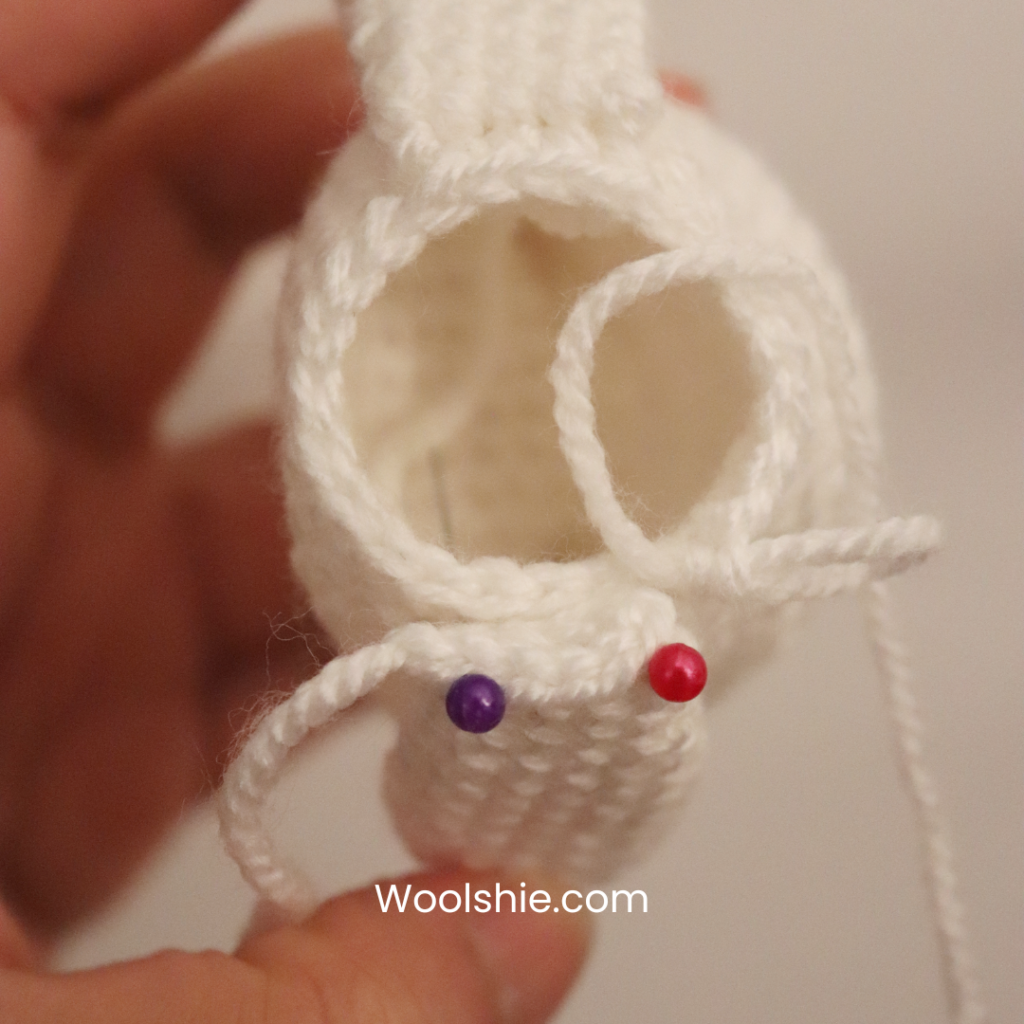
After finishing and fastening off both feet, assign left and right. Begin working on the right foot to combine left foot.
Tip: Take your time during this section. The images below will guide you through the joining process step by step. Also, fill with fiberfill gradually.
Round 1.
*Right foot* Join with a sl st in the 10th stitch of the right foot’s last row, then CH 2
connect the left foot
*Left foot* sl st on the 3rd stitch of the left foot’s last row, 1 sc in the same stitch where you made the sl st, 11 sc around the left foot, CH 2
*Right foot* sl st on the 12th stitch of the last row, 1 sc on the same stitch where you made the slip stitch, 10 sc, 1 sc on the sl (28)
Then, work around for the next round.
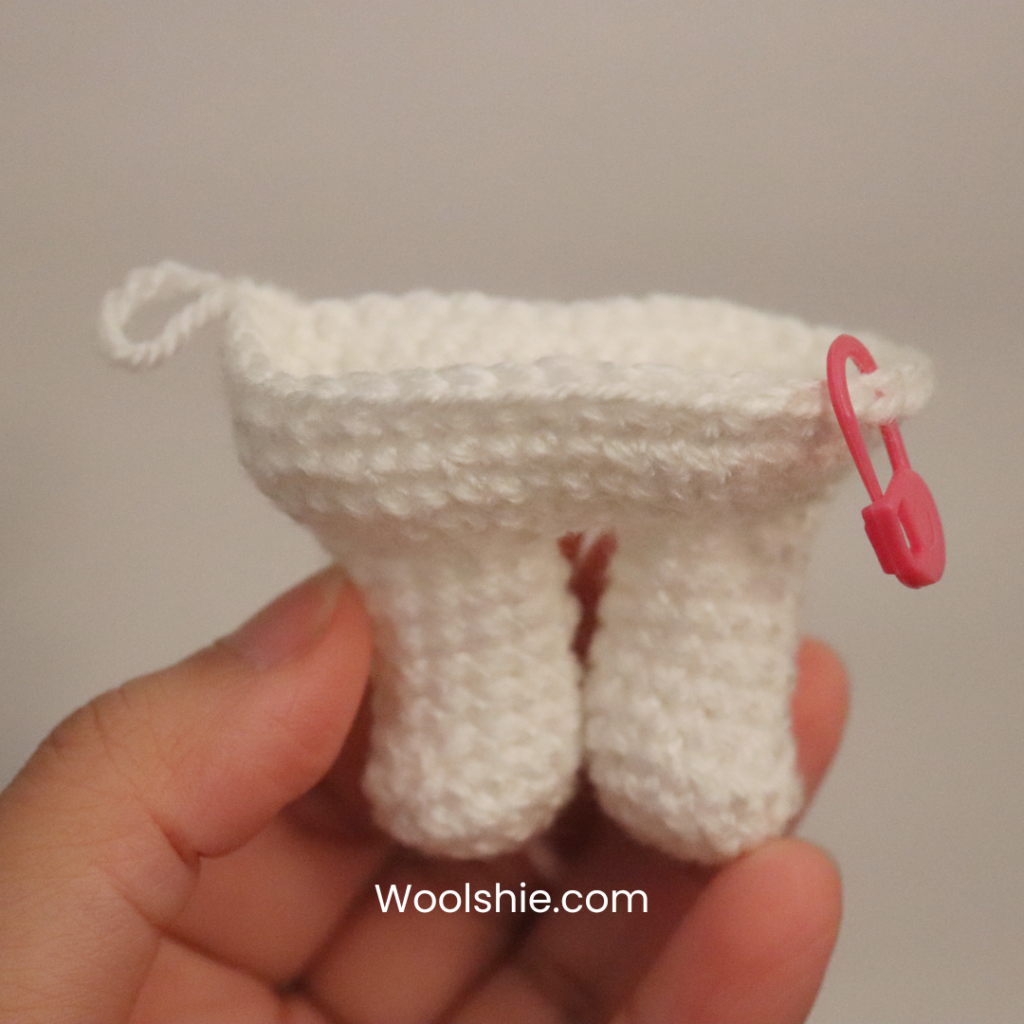
Round 2. 6 inc, 18 sc, 4 inc (38)
Note: For Round 2, make the first 2 inc on the CH 2 of the previous round. Then, at the back part, just 2 sc on the CH 2. When you reach higher than Round 3, you can sew the CH 2 together to close.
Round 3. 35 sc only (38)
Note: This round adjusts stitch alignment for body shaping.
Go back to where you made CH 2. Sew the inner part of both CH 2.
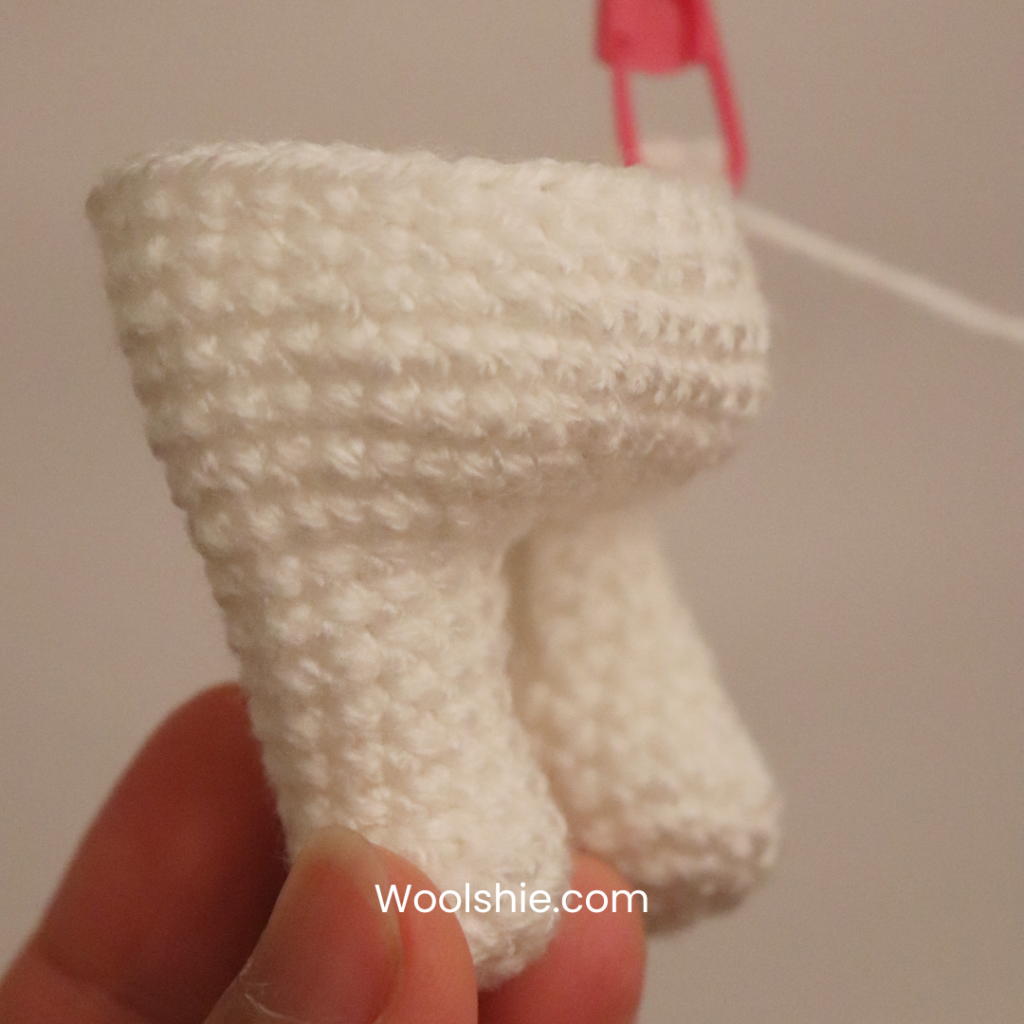
Round 4. 1 dec, 1 sc, 1 dec, 33 sc (36)
Rounds 5-6. Sc all around (36)
Round 7. 4 sc, dec, 30 sc (35)
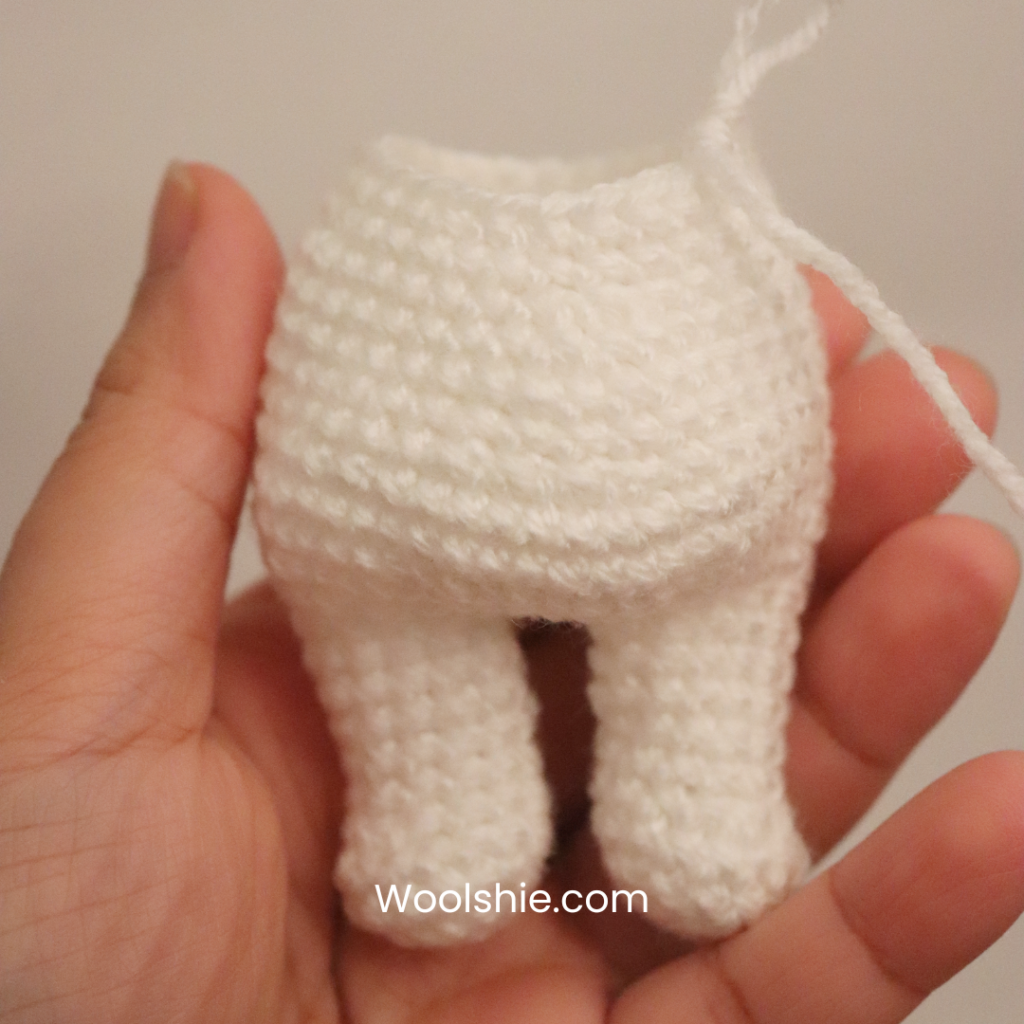
Round 8. 3 sc, 2 dec, 28 sc (33)
Round 9. [9 sc, dec] x3 (30)
Round 10. Sc all around (30)
Round 11. [4 sc, dec, 4sc] x3 (27)
Round 12. Sc all around (27)
Round 13. [7 sc, dec] x3 (24)
Flatten each arm before joining to ensure the stitches align evenly with the body.
Round 14. 20 sc, connect the arm together by joining with the 4 sc (24)
Round 15. 6sc, dec, connect the arm together by joining with the 4 sc, 2sc, dec, 6 sc, dec (21)
Round 16. 16 sc, BLO 3 sc – end of the body part.

Head
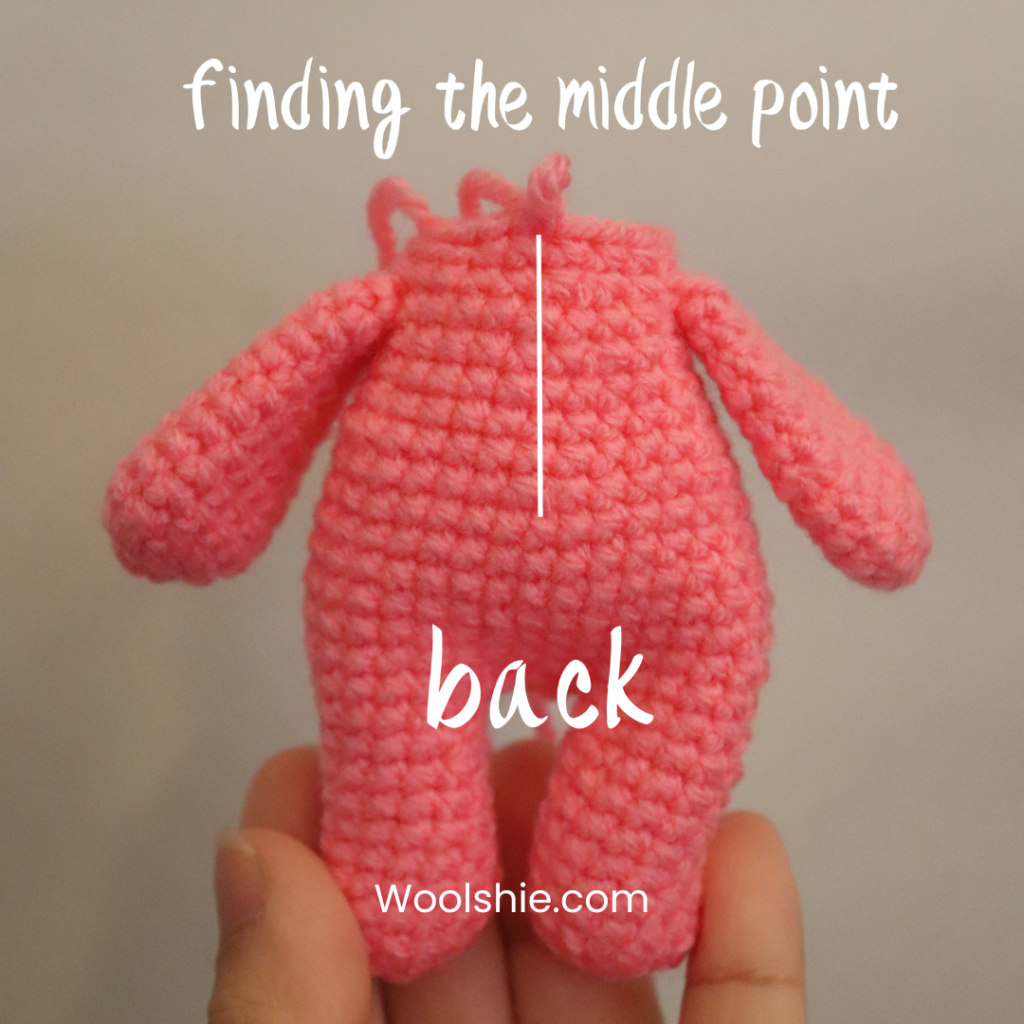
We continue to work for the head part; we begin with the back part of the body.
Round 1. Insert the hook on the 15th stitch of the last row (body) and pull through, form a slip stitch, then 1 sc on the same stitch, 20 sc (21)
If 15th stitch of the last row is not in the middle, find the middle point at the back. Adjust by ±1 stitch if needed to align the head symmetrically.
Round 2. [1 inc, 1 sc] x10, 1 inc (32)
Round 3. [2 sc, inc] x10, 2 sc (42)
Round 4. Sc all around (42)
Round 5. [6 sc, inc] x6 (48)
Rounds 6-10. Sc all around (48)
Round 11. [14 sc, dec] x3 (45)
Round 12. [dec, 13 sc] x3 (42)
Round 13. Sc all around (42)
Round 14. [6 sc, dec, 6 sc] x3 (39)
Round 15. [11 sc, dec] x3 (36)
Insert amigurumi safety eyes between Round 10 and 11 with 7 stitches apart. Add the eye lining details by embroidering it on the side of the eyes.
Before I closed the head, I sewed the nose/muzzle. I added a little fiberfill and placed it in the middle-bottom of the eyes. You can sew it before or after closing, whichever is comfortable with you.
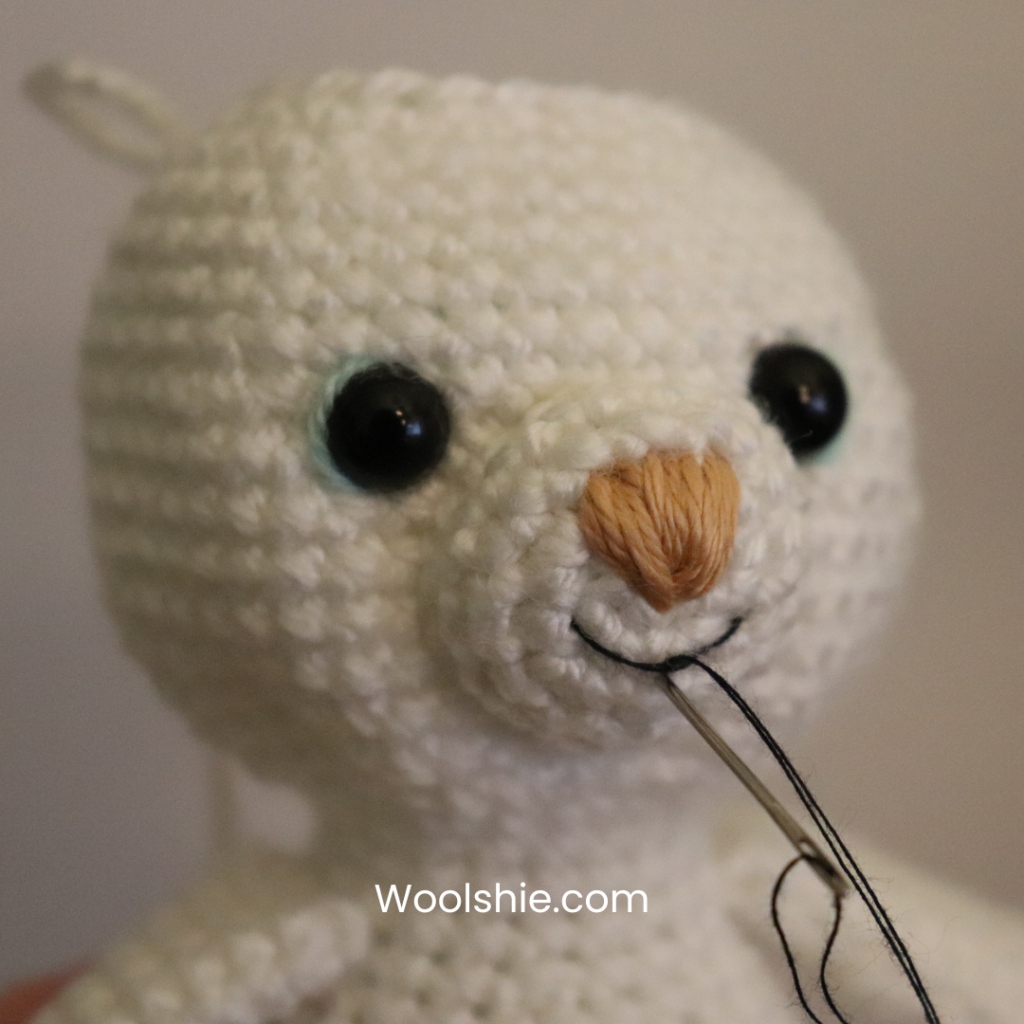
Nose/Muzzle details: Use light brown yarn and embroider the nose in triangular form.
Use black thread and sewing needle, embroider the smiling mouth. You can be creative how you would like to embroider the mouth.
Round 16. [4 sc, dec] x6 (30)
Round 17. [2 sc, dec, 1 sc] x6 (24)
Round 18. [2 sc, dec, 4 sc] x3 (21)
Round 19. [5 sc, dec] x3 (18)
Round 20. [1 sc, dec] x6 (12)
Close the head, fasten off by sewing together all the 12 stitches using yarn needle.
Assemble the Parts
- Sew the nose/muzzle with the long yarn end and yarn needle. Place it in the between/middle-bottom part of both eyes. Use a little fiberfill to puff out the detail of the muzzle.
- Place ears evenly on each side of the head, slightly behind the eye line. Pin in place before sewing to ensure symmetry.Sew the ears using yarn needle and with the long yarn end.
Scarf
Use the bulky/chenille yarn with 2.5 mm crochet hook with loose stitches. You can also use a higher size of crochet hook.
Begin with CH 30, 1 sc on the second ch from the hook, sc until the end of the ch. Continue crocheting until the scarf reaches your desired length, or add more starting chains if you prefer a longer scarf.
Voila! You did it!
Show and share your work! Tag me on Instagram, Facebook, TikTok, or Pinterest — I’d love to see your makes and I love supporting fellow crocheters!
Want the full printable PDF?
The Ad-free pattern of Polar Bear including props is out! Sign up below and it will be sent straight to your inbox
Pattern Support
If you need help and assistance or want to ask questions about the pattern, please contact us on our contact page. I am always happy to help and want you to enjoy the crocheting process as much as possible. My social media profiles are all available for your message. If you choose to modify the pattern or use a different yarn weight or crochet hook size, you can share your questions to our Facebook WCC Woolshie Crochet Club.
Beginner Tips for Success
If this is one of your first crochet projects, keep these tips in mind:
- Count your stitches at the end of each row
- Use a stitch marker to track row ends
- Maintain even tension and tight stitches
- Take your time — small projects are perfect for practice
Crochet is meant to be relaxing, so don’t worry about perfection. Each piece you make helps build confidence and skill.
If you enjoyed crocheting Pito the Polar Bear, you may also like exploring other beginner crochet patterns and free crochet projects available on Woolshie. Be sure to bookmark this page or share it with fellow crocheters who love quick and cozy handmade projects.
Accessibility Statement
This crochet pattern is written in clear, beginner-friendly language and designed to be accessible for a wide range of crocheters.
Beginner Tips for Success
If this is one of your first crochet projects, here are some tips to help you succeed:
- Count your stitches at the end of each round to avoid mistakes.
- Use a stitch marker to keep track of round starts and ends.
- Maintain even tension and slightly tighter stitches for amigurumi.
- Take your time — small projects are perfect for practice and skill-building.
- Embrace imperfections — crochet is meant to be relaxing, and each piece you make builds confidence.
Explore More
If you enjoyed making Pito the Polar Bear, you may also like:
- Upcoming crochet projects for seasonal crochet and cozy handmade gifts
- Macy the Little Mouse Easy Crochet Pattern
- Mini Horse Lunar New Year Beginner-friendly Crochet Pattern
- Tiny Donuts Very Easy Crochet Pattern
- See all Crochet Patterns
Be sure to bookmark this page or share it with fellow crocheters who love quick, charming, and enjoyable crochet projects, especially this little mouse crochet pattern.
Looking for a Crochet Buddy?
Let’s get connected! I would love to be your crochet buddy, sharing crochet WIPS and finished makes!
Total Beginner to Crochet?
Don’t worry! At Woolshie, crochet tutorials and beginner course are available for free.